Android Presence SDK Integration Guide
What You Need
To integrate Presence SDK in your application, you will need the latest release of the Presence SDK for Android.
New Presence SDK Integration Demo Project
To gain insight on how to properly integrate the Presence SDK in your app or for help with a step below, you may download and reference this demo project.
Requirements
- Presence SDK Version 1.22.x and higher requires Android X and is no longer compatible with older Android Support Libraries
- Supported API level 21 ~ 29.
- SDK now request for android.permission.READ_EXTERNAL_STORAGE
- com.ticketmaster.presence:secure-entry library updated to 1.2.2
- androidx.activity:activity-ktx library updated to 1.3.1
- androidx.fragment:fragment library updated to 1.3.6
- Only Portrait Orientation Supported.
- Offline Ticket Mode, which allows fans to access their tickets without a network connection, also requires that the app be accessible offline.
- In step 7 below, you will be required to enter your scheme name. To get your scheme name, please reach out to your local Ticketmaster representative.
- Java 1.8
- Step 9 Optional: If your app supports transfer tickets via SMS, you must add the following permission to your Android Manifest.xml file.
<uses-permission android:name="android.permission.SEND_SMS"/>Permissions
- INTERNET
- ACCESS_NETWORK_STATE
- READ_CONTACTS
- WAKE_LOCK
Importing The SDK
Follow these steps to integrate and configure the SDK into your Android project.
Step 1. Download the Android Presence Sdk
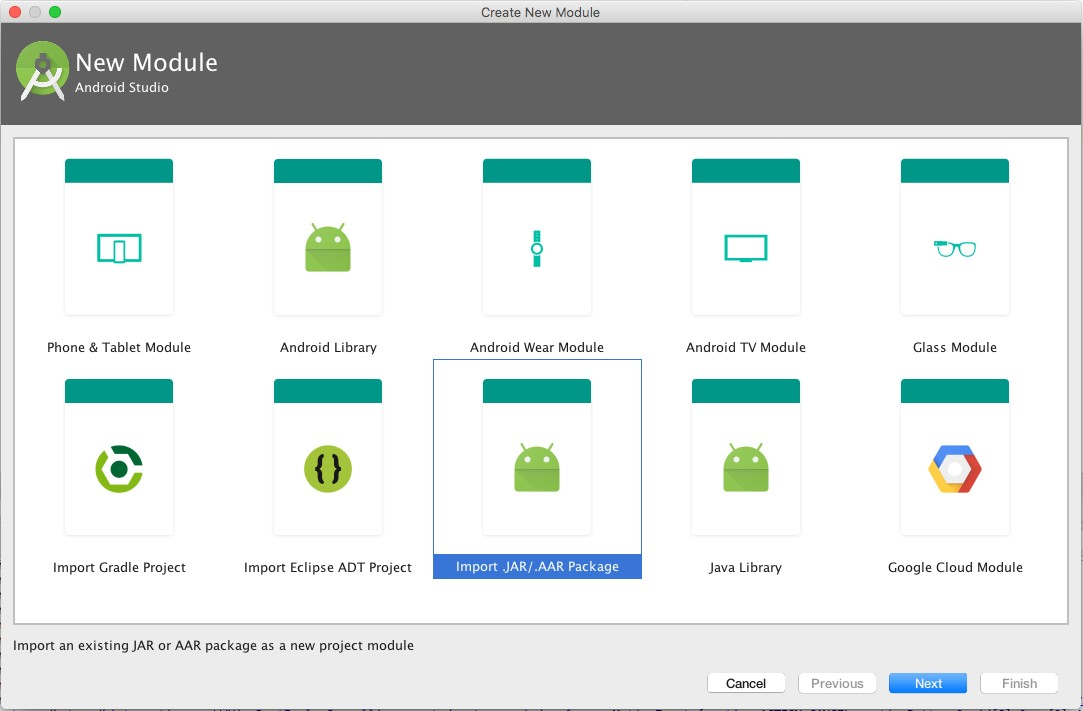
Step 2. In Android Studio with your project open, from the file menu: File -> New -> New Module -> Import .JAR / .AAR package and locate the Presence SDK .aar file downloaded in the previous step.

Step 3. Open your app module’s build.gradle file enable Java 1.8
android{
  //..
  compileOptions {
        sourceCompatibility JavaVersion.VERSION_1_8
        targetCompatibility JavaVersion.VERSION_1_8
    }

}
and add the following dependencies:
implementation 'com.ticketmaster.presence:secure-entry:1.2.9'
implementation 'androidx.lifecycle:lifecycle-extensions:2.2.0'
implementation 'androidx.constraintlayout:constraintlayout:1.1.3'
implementation 'androidx.cardview:cardview:1.0.0'
implementation 'androidx.appcompat:appcompat:1.1.0'
implementation 'androidx.recyclerview:recyclerview:1.1.0'
implementation 'androidx.multidex:multidex:2.0.1'
implementation 'com.google.android.material:material:1.0.0'
implementation 'com.android.volley:volley:1.1.1'
implementation 'com.google.code.gson:gson:2.8.5'
implementation 'com.squareup.picasso:picasso:2.71828'
implementation 'com.romandanylyk:pageindicatorview:0.0.5'
implementation 'com.google.android.gms:play-services-ads:16.0.0'
implementation 'org.jetbrains.kotlin:kotlin.stdlib-jdk8:1.3.31'
implementation 'androidx.room:room-runtime:2.2.3'
implementation 'androidx.activity:activity-ktx:1.3.1'
implementation 'androidx.fragment:fragment:1.3.6'

implementation 'androidx.annotation:annotation:1.1.0'
implementation 'androidx.localbroadcastmanager:localbroadcastmanager:1.0.0'
implementation 'com.google.zxing:core:3.2.1'
implementation 'commons-net:commons-net:3.6'
If you have any dependencies that are already declared in your project you can skip those dependencies from this list. For example you might have the constraintlayout dependency in your project so you can skip adding constraintlayout from this list.
In your repositories add jcenter(), it might be located in your build.gradle or settings.gradle and sync the project with the new gradle changes.
Step 4. Open your application’s AndroidManifest.xml file and add the attribute tools:replace="android:theme" to the application tag like so:
<application
    android:allowBackup="true"
    android:icon="@mipmap/ic_launcher"
    android:label="@string/app_name"
    android:roundIcon="@mipmap/ic_launcher_round"
    android:supportsRtl="true"
    android:testOnly="false"
    android:theme="@style/AppTheme"
    tools:replace="android:theme">
Step 5 Create a new layout file named activity_psdk_host.xml and paste in the following xml:
<?xml version="1.0" encoding="utf-8"?>
<FrameLayout
    xmlns:android="http://schemas.android.com/apk/res/android"
    android:id="@+id/presenceSDK"
    android:layout_width="match_parent"
    android:layout_height="match_parent"/>
Step 6 Create a new Activity name PresenceSdkHostActivity and replace the generated code with the following code:
public class PresenceSdkHostActivity extends AppCompatActivity implements PresenceSdkConfigListener {

    private static final String TAG = PresenceSdkHostActivity.class.getSimpleName();

    // Note: This is a simplified version of the PresenceLoginListener, see the reference guide for more details
    private final PresenceSimpleLoginListener mSimpleLoginListener = new PresenceSimpleLoginListener() {
        @Override
        public void onLoginSuccessful(BackendName backendName, String accessToken) {
            super.onLoginSuccessful(backendName, accessToken);
            Log.d(TAG, "onLoginSuccessful() called with: backendName = ["
                    + backendName + "], accessToken = [" + accessToken + "]");
        }

        @Override
        public void onLoginCancelled(BackendName backendName) {
            super.onLoginCancelled(backendName);
            Log.d(TAG, "onLoginCancelled() called with: backendName = [" + backendName + "]");
        }

        @Override
        public void onMemberUpdated(TMLoginApi.BackendName backendName, @Nullable UserInfoManager.MemberInfo member) {
            super.onMemberUpdated(backendName, member);
            Log.d(TAG, "onMemberUpdated() called with: backendName = [" + backendName + "], member = [" + member + "]");
        }

        @Override
        public void onLogoutFailed(BackendName backendName, String errorMessage) {
            super.onLogoutFailed(backendName, errorMessage);
            Log.d(TAG, "onLogoutFailed() called with: backendName = [" + backendName + "], errorMessage = [" + errorMessage + "]");
        }


        @Override
        public void onLogoutSuccessful(BackendName backendName) {
            super.onLogoutSuccessful(backendName);
            Log.d(TAG, "onLogoutSuccessful() called with: backendName = [" + backendName + "]");
            // TODO: it is safe to sign back in after this callback is received for modern accounts logins (see Step 7)
        }
    };

    @Override
    protected void onCreate(Bundle savedInstanceState) {
        super.onCreate(savedInstanceState);
        setContentView(R.layout.activity_psdk_host);

        // configure the Presence SDK
        configurePresenceSDK();
    }

    private void configurePresenceSDK() {

        // Attach this Activity to receive callbacks for the configuration listener
        PresenceSDK.getPresenceSDK(getApplicationContext()).registerConfigListener(this);

        // Configure your branding color for the SDK
        PresenceSDK.getPresenceSDK(getApplicationContext())
                .setBrandingColor(Color.parseColor(BuildConfig.BRANDING_COLOR));

        // Set the configuration
        PresenceSDK.getPresenceSDK(getApplicationContext()).setConfig(
                BuildConfig.CONSUMER_KEY, /* Consumer key provided on dev portal */
                BuildConfig.TEAM_NAME, /* your team display name */
                BuildConfig.USE_NAM); /* true for new account manager or false for classic */
    }

    @Override
    public void onPresenceSdkConfigSuccessful() {
        Log.d(TAG, "onPresenceSdkConfigSuccessful() called");

        // unregister the configuration listener
        PresenceSDK.getPresenceSDK(getApplicationContext()).unregisterConfigListener(PresenceSdkHostActivity.this);

        // start the SDK when configuration is successful
        PresenceSDK.getPresenceSDK(getApplicationContext())
                .start(PresenceSdkHostActivity.this, R.id.presenceSDK, mSimpleLoginListener);
    }

    @Override
    public void onPresenceSdkConfigFailed(String errorMessage) {
        Log.d(TAG, "onPresenceSdkConfigFailed() called with: errorMessage = [" + errorMessage + "]");

        // unregister the configuration listener
        PresenceSDK.getPresenceSDK(getApplicationContext()).unregisterConfigListener(PresenceSdkHostActivity.this);
    }
}
BuildConfig.CONSUMER_KEY - To get consumer key please create an account on https://developer.ticketmaster.com and register your app and it will generate a consumer key that can be used in the above method. Before you can use Presence SDK you will have to provide the generated consumer key together with consumer secret and redirect URI to Presence SDK support team so we can configure your app on our end!
BuildConfig.TEAM_NAME - The team name for the integrator’s application. (ex. “Kansas City Chiefs”)
NOTE: Create all the BuildConfig values in your app’s build.gradle file.
NOTE: Be aware that you NEED to pass the Application Context object (NOT activity context) to PresenceSDK.getPresenceSDK(Context context) method. If it is not an Application Context, the Presence SDK might reject and throw a runtime exception with a message to bring it to the developer’s attention.
NOTE: Do you wait for the configuration callback before calling start? You can also call PresenceSDK.getPresenceSDK(,,).setConfig() much sooner in your app to avoid timing issues. setConfig is async so it can lead to a race condition if you don’t wait for it to respond.
We have also added the ability to start to login flow for specific backend environments. Please see the example below:
// Host example
PresenceSDK.startLoginFlow(appCompatActivity, TMLoginApi.BackendName.HOST, MainActivity.this);

// Archtics example
PresenceSDK.startLoginFlow(appCompatActivity, TMLoginApi.BackendName.ARCHTICS, MainActivity.this);
Step 7: Instructions for Modern Accounts Login
For Modern Accounts Logins, open the AndroidManifest.xml and add the following ModernAccountsLoginActivity:
<activity
    android:name="com.ticketmaster.presencesdk.login.ModernAccountsLoginActivity"
    android:screenOrientation="portrait" >
    <intent-filter>
        <action android:name="android.intent.action.VIEW" />
        <category android:name="android.intent.category.DEFAULT" />
        <category android:name="android.intent.category.BROWSABLE" />
        <!-- YOUR SCHEME will be provided in your apps settings, copy it to this location-->
        <data android:scheme="psdkscheme[client scheme name]" />
    </intent-filter>
</activity>
NOTE: Please reach out to your local Ticketmaster representative to get your scheme name that will be input above where it states your_scheme_goes_here.
NOTE: Your scheme should be all lowercase of form psdkscheme[client scheme name] example for scheme name “horns” would “psdkschemehorns”
Step 8 Copy the following xml inside your application tag of your AndroidManifest.xml file
<activity android:name="com.your.company.PresenceSdkHostActivity"
  android:screenOrientation="portrait"/>
NOTE: replace com.your.company with your package name.
Step 9 Optional: If your app supports transfer tickets via SMS, you must add the following permission to your Android Manifest.xml file.
<uses-permission android:name="android.permission.SEND_SMS"/>Step 10 Optional: Sometimes, PresenceSDK needs to recognize that the environment was set for the UK region. To fix this issue, You will need to the following method before calling the start method on the PresenceSDK class.
TMXGlobalConstants.setEnvironment(SDKEnviroment, HostEnvironment, Context);Step 11 Run the application
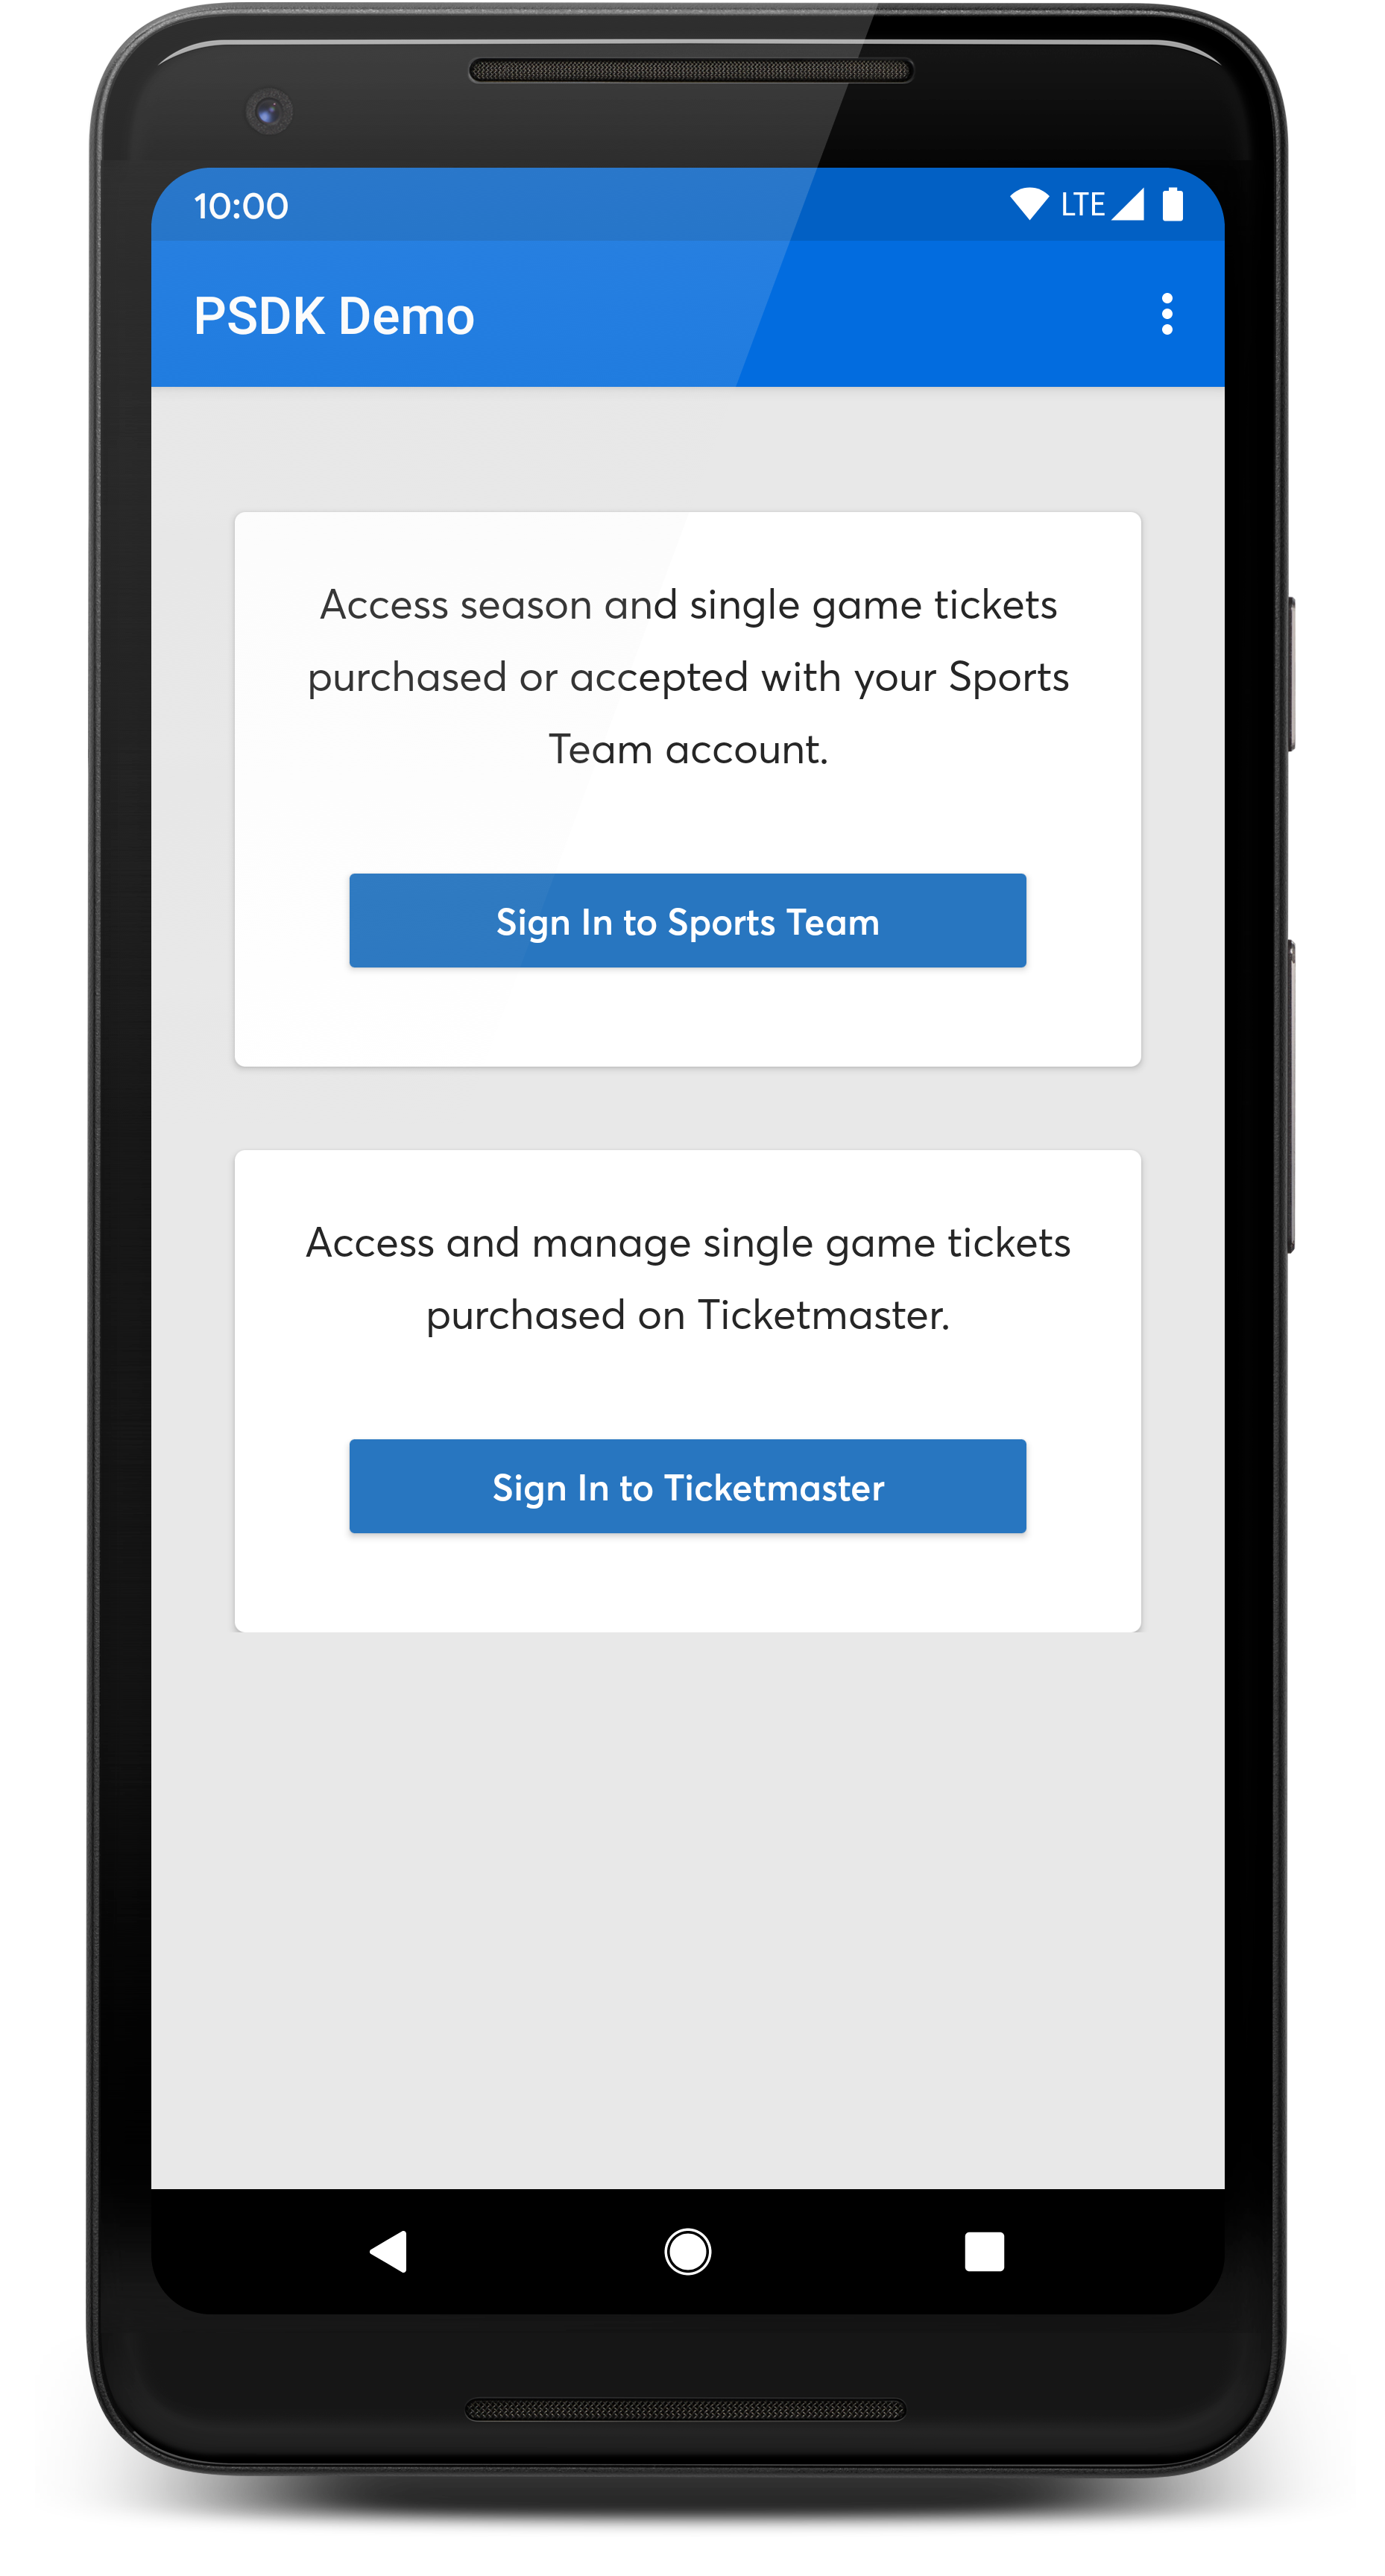
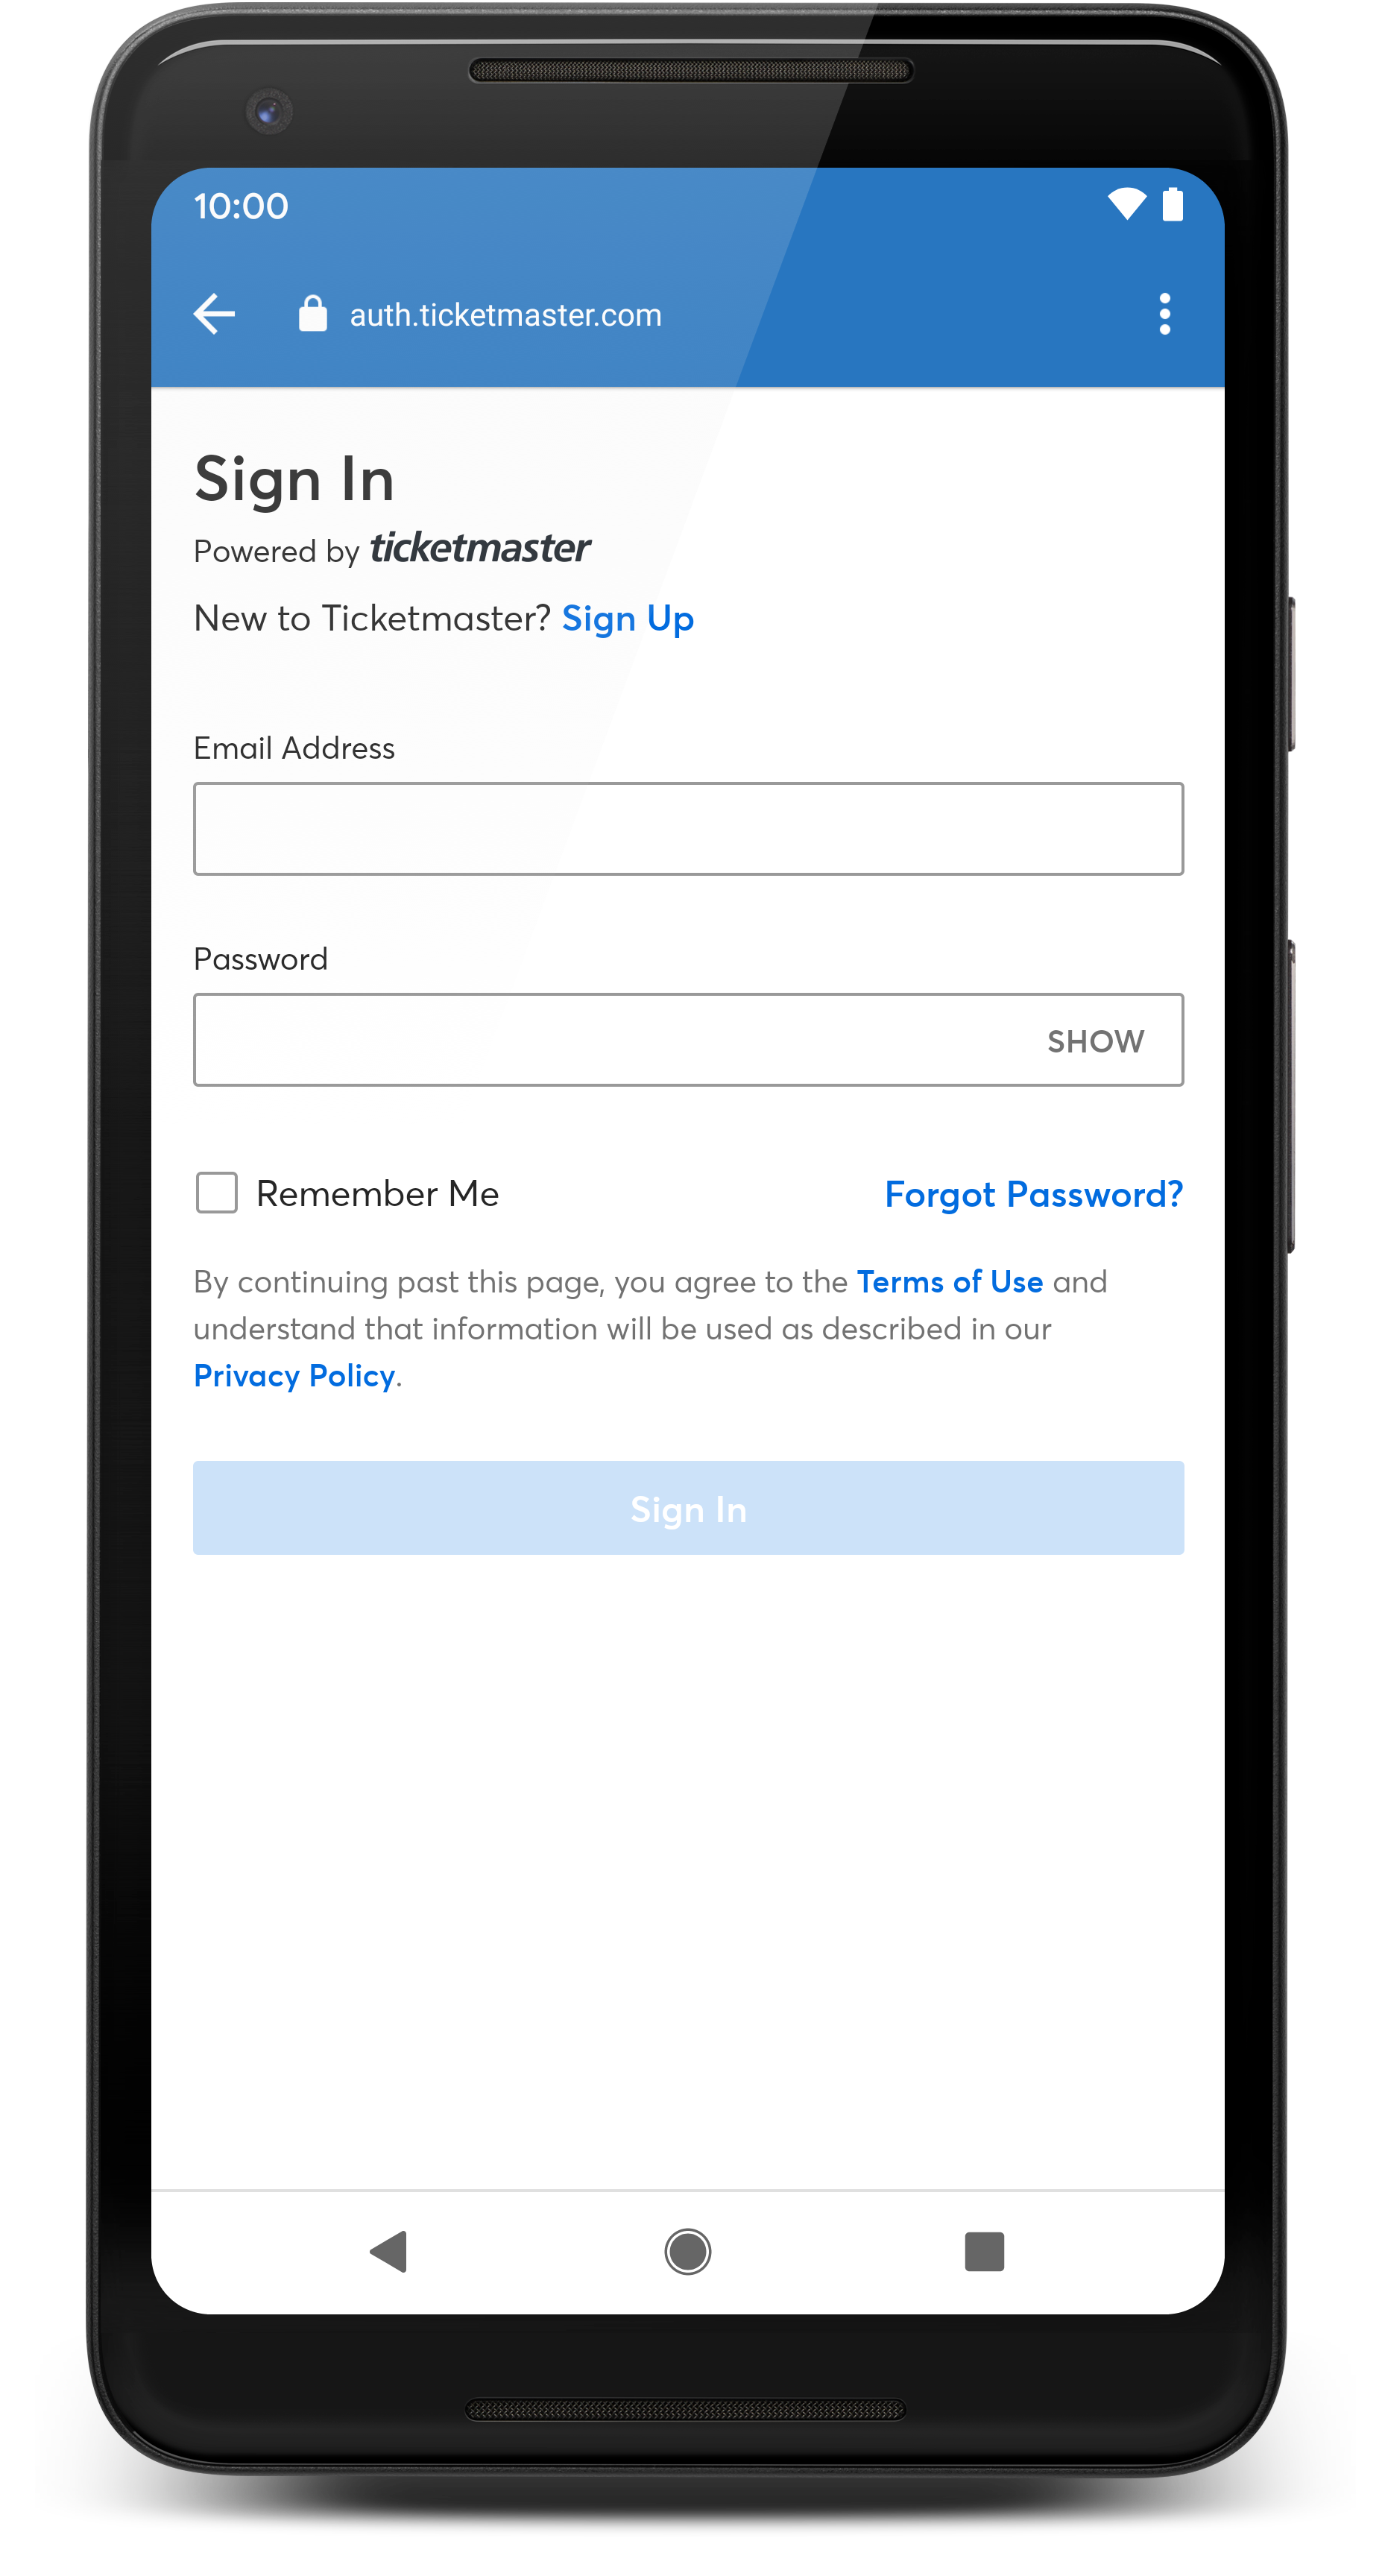
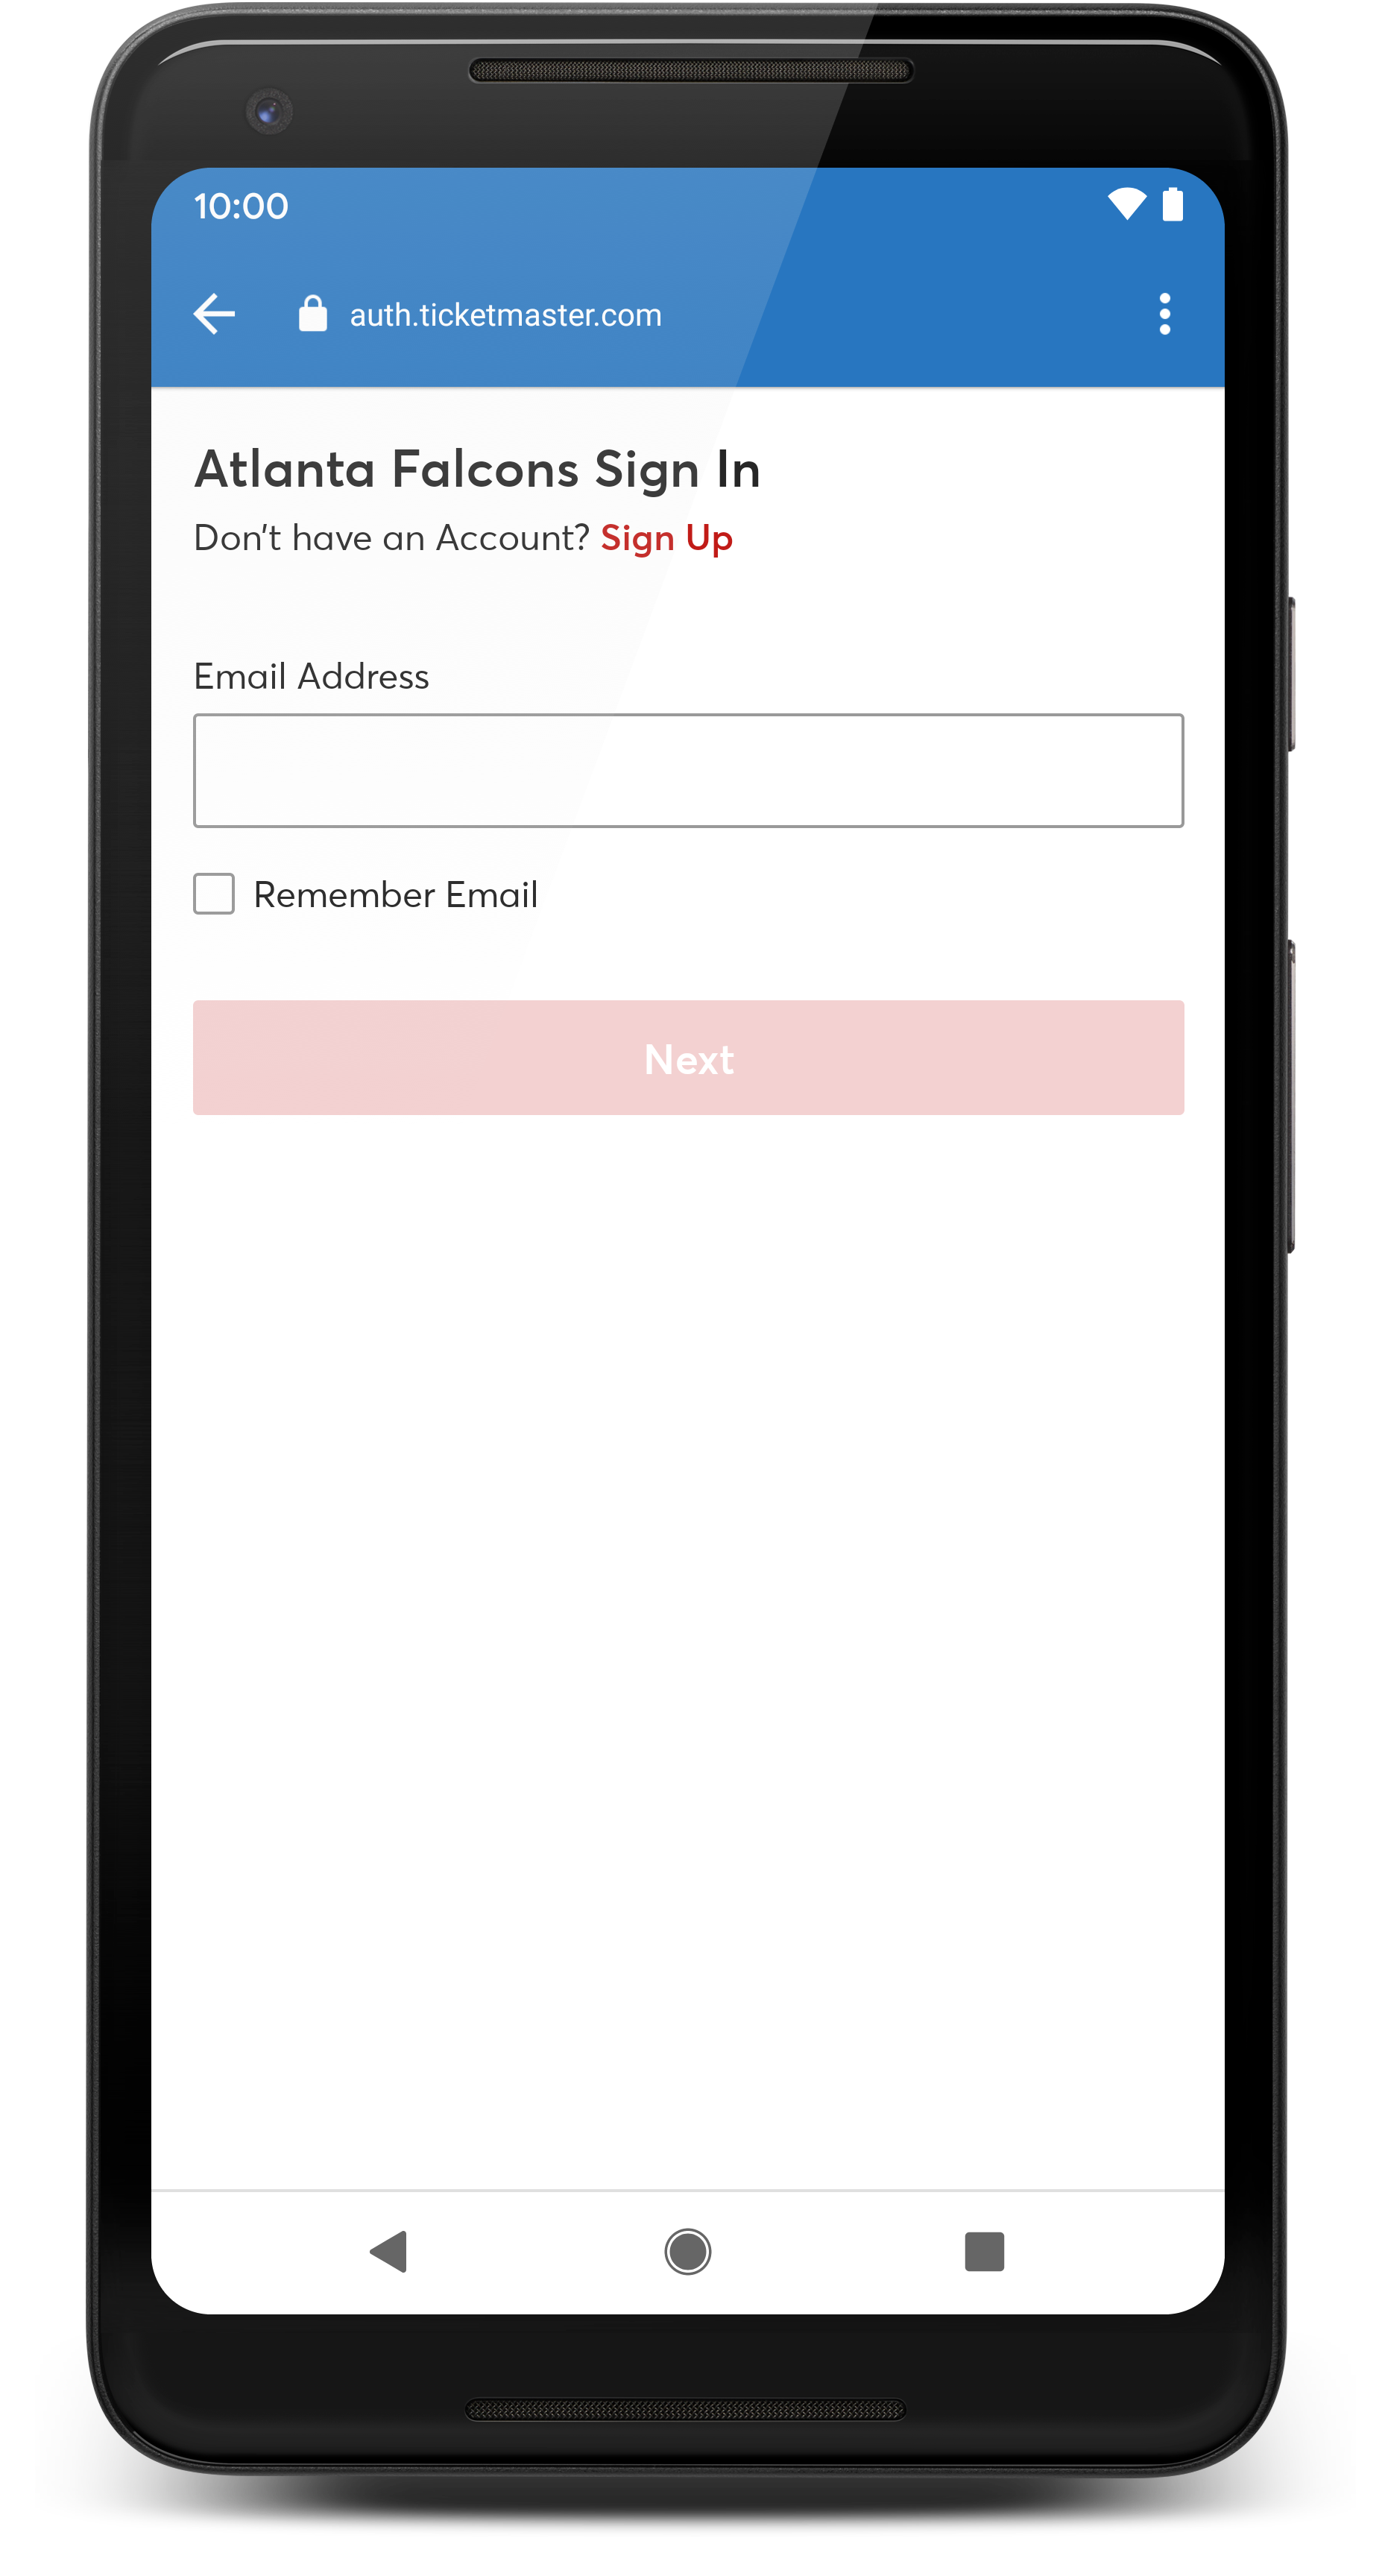
This will load the entry fragment (UI shown below) where a login screen will prompt users to login with their Team and/or Ticketmaster account.


Step 12: Instructions for onLogoutSuccessful and onLogoutAllSuccessful
From the SDK, it is possible that logout could be initiated inside SDK so the handling of onLogoutSuccessful() and onLogoutAllSuccessful() is obligatory now, otherwise you can get an empty view.
For example, onLogoutSuccessfull the application can quit or initiate a new Login flow in this case if needed. In onLogoutSuccessful() handler you should check whether the just logged out account was the last one.
EXAMPLE:
   @Override
   public void onLogoutSuccessful(TMLoginApi.BackendName backendName) {
       if(!PresenceSDK.getInstance(getContext()).isLoggedIn()) {    // the last account just logged out
           PresenceSDK.getInstance(getContext()).loginToHost();   // login anew or finish();
       } else {
           TMLoginApi.getInstance(getContext()).proceedToEventList();  //refresh list and account switcher
       }
   }
   @Override
   public void onLogoutAllSuccessful() {
       PresenceSDK.getInstance(getContext()).loginToHost();
   }
If the application forces PresenceSDK.logOut() it is not necessary to launch a new Login flow immediately. Better to do it in onLogoutSuccessful()
NOTE:It is also recommended to handle onLoginCancelled() callback in the same way
Android Presence SDK Reference Guide
SportXR Onboarding
1.- Add the newest version of the Presence sdk using the next line in your build.gradle (app level):
    implementation 'com.ticketmaster.presence:presence:2.xx.xx'
    (Look for the newest version on https://developer.ticketmaster.com/products-and-docs/sdks/presence-sdk/)

2.- Add the SportsXRLoginActivity to your manifest with the next lines:
    <activity
            android:name="com.ticketmaster.presencesdk.login.SportsXRLoginActivity"
            android:screenOrientation="portrait"
            android:exported="true">
            <intent-filter>
                <action android:name="android.intent.action.VIEW" />
                <category android:name="android.intent.category.DEFAULT" />
                <category android:name="android.intent.category.BROWSABLE" />
                <data android:scheme="YOUR_SCHEME_PROVIDED_BY_CLIENT_SUPPORT" android:host="login" />
            </intent-filter>
        </activity>

3.- Set the environment:
    PresenceSDK.getPresenceSDK(getApplicationContext()).setEnvironment(
        PresenceSDK.SDKEnvironment.Production,
        PresenceSDK.HostEnvironment.UK
    );

4.- Set the configuration:
    PresenceSDK.getPresenceSDK(getApplicationContext()).setConfig(
                BuildConfig.CONSUMER_KEY, /* Consumer key provided on dev portal */
                BuildConfig.TEAM_NAME, /* your team display name */
                BuildConfig.USE_NAM,
                true,
                false,
                PresenceSDK.HostEnvironment.UK
        );
PresenceLoginListener Methods
The PresenceLoginListener interface has the below contract. You can implement all methods here using this interface or use the SimplePresenceLoginListener in the code sample above to selectively include the methods you want.
public interface PresenceLoginListener {

  // Call back when login was successful, and authorized.
  void onLoginSuccessful(BackendName backenName, String accessToken);

  // Call back when failed to acquire access token from the specified TMLoginApi.BackendName server.
  void onLoginFailed(BackendName backenName, String errorMessage);

  // Login was cancelled by user via back button.
  void onLoginCancelled(BackendName backenName);

  // Notify what login method was used to get an access token.
  void onLoginMethodUsed(BackendName backenName, LoginMethod method);

  // Notify when user clicks on "forgot paswword" link
  void onLoginForgotPasswordClicked(BackendName backenName);

  // Notify when all cache is cleared
  void onCacheCleared();

  // Notify when received user information
  void onMemberUpdated(BackendName backenName, @Nullable MemberInfo memberInfo);

  // Notify when successfully logged-out
  void onLogoutSuccessful(BackendName backenName);

  // Notify when successfully logged-out from both backends
  void onLogoutAllSuccessful();

  // Notify when logout fails
  void onLogoutFailed(TMLoginApi.BackendName backendName, final String errorMessage);

  // A callback to notify that the access token has been successfully refreshed.
  void onTokenRefreshed(BackendName backenName, String accessToken);

  // A callback to notify that the access token has failed to refreshed.
  void onRefreshTokenFailed(BackendName backenName);

  // A callback to notify that SDK needs to display Identity login window when token is not present or can't be refreshed
  void onLoginWindowDidDisplay(BackendName backenName);
}
Jump to Order / Jump to Event
We have revamped our Jump to Order and Jump to Event logic. If event is found for given id, the method opens the list of tickets related to the found event. If order is found for given id, the method opens the list of tickets related to the found order.
//We supply a generic method used to jump to any matching orderID or EventID.
PresenceSDK.getInstance(getContext()).jumpToOrderOrEvent(context, “12345”); // context is application context or activity context

//If you would like to specify only order or event, you can do the following.
PresenceSDK.getInstance(getContext()).jumpToOrderOrEvent(context, “12345", EventIdType.order);  // context is application context or activity context
PresenceSDK.getInstance(getContext()).jumpToOrderOrEvent(context, “12345”, EventIdType.event);  // context is application context or activity context

//This will operate the same as the shortened method posted higher up.
PresenceSDK.getInstance(getContext()).jumpToOrderOrEvent(context, “12345”, EventIdType.any); // context is application context or activity context

//The following has been deprecated and will give a warning. We recommend moving to the new methods asap.
PresenceSDK.getInstance(getContext()).displayOrder(context, “12345”) //deprecated
// You can specify whether the identifier string you supply is an order id or event id. If you are not sure about identifier type you can search for this identifier both in orders and events. To specify identifier type use value of IdType:
public enum EventIdType {
event,
order,
any
}Configure Brand Logo
Configure your brand logo with a resourceID of the image you would like to use. This image will show up in the linking screen replacing the brand abbreviation. If you do not set a brand logo, then the abbreviation will work like before. Ex: TicketMaster becomes TM.
PresenceSDK.getInstance(getContext()).setLogoResourceId(int resourceId)Specifying a Branding Color
Presence sdk clients can set their own branding theme color by defining this color value in their application resource “colors.xml” file:
<color name="presence_sdk_color_branding">#FFAA81</color>The defined color will be displayed on all action buttons, action bars and ticket details page. If the above color variable is not defined in the client’s apk project, Tmx sdk will use a default color.
Also, there is a way to change the color at run time.
// Deprecated API
PresenceSDK.getPresenceSDK(this).setBrandingColor(Color.parseColor("#ffff0000"));

// New API
@Color int brandingColor = Color.parseColor("#ffff0000");
@Color int headerColor = Color.parseColor("#00ff0000");
@Color int ticketColor = Color.parseColor("#00ffff00");
PresenceSDK.getPresenceSDK(this).setBrandingColor(brandingColor, headerColor, ticketColor);
The defined color will be displayed on all action buttons, action bars and ticket details page. If the above color variable is not defined in the client’s apk project, Tmx sdk will use a default color.
Configure Team Theme
Configure your team’s theme as PresenceSdkTheme.Light (default) or PresenceSdkTheme.Dark. The theme configuration lets PresenceSDK
know how to setup various UI elements to contrast with branding color. For example, if branding
color is in the dark color spectrum, a Light theme configuration will color various UI elements white.
This will allow crucial UI element to be visible to the user.
/**
* Method to set content color of UI elements with branding background color
* @param theme - light theme uses white color, dark theme uses black color
*/
public void setTheme(PresenceSdkTheme theme)
Configure Login Item
Because Account Manager’s website only supports Forgot Password OR Create account, we have updated the SDK to do the same to remove confusion for your users. by default if not specified, you will see Forgot Password.
// If you wish to use Create Accounts
PresenceSDK.getPresenceSDK(getApplicationContext()).setLoginAccountOptionButton(LoginAccountOption.CREATE_ACCOUNT)

// If you wish to use Forgot Password
PresenceSDK.getPresenceSDK(getApplicationContext()).setLoginAccountOptionButton(LoginAccountOption.FORGOT_PASSWORD)
Suppress View After Login
Presence SDK gives the ability to allow the user to login, and not display the event list. All you need to do is utilize the following overloaded startLoginFlow method with the corresponding backend name.
public static void startLoginFlow(AppCompatActivity context, @NonNull TMLoginApi.BackendName backendName, @NonNull PresenceLoginListener listener);Once the user has succesfully logged in, you can then dismiss or hide the view.
Logout Methods
You can implement log out functionality on your UI with by calling these API:
// TM logout
PresenceSDK.getPresenceSDK(context).logOutHost();

// Team logout
PresenceSDK.getPresenceSDK(context).logOutTeam();

// logout both
PresenceSDK.getPresenceSDK(context).logOut();Note: Please note that a fan’s tickets will no longer be available on the device for offline viewing if logout is called, as it will clear the cache.
Check Login Status
Presence SDK also provides some helper methods for checking if user is logged into any of the supported services.
// Method to check if user is logged in any of the service  i.e Host or Accounts
// Manger and has a valid access token available.
PresenceSDK.getPresenceSDK(context).isLoggedIn();

// Method to check if user is logged in Host and has a valid access token available.
PresenceSDK.getPresenceSDK(context).isLoggedIntoHost();

// Method to check if user is logged in Accounts Manager and has a valid access token available.
PresenceSDK.getPresenceSDK(context).isLoggedIntoTeam();
Global Methods
  // This method returns version number of the SDK as a String.
  public String getVersionNumber()

  /**
    * Gets an access token for a given backend.
    *
    * This will prompt a login if the user is not logged in already and
    * will refresh the access token automatically if they were logged in.
    *
    * @param context       Activity Context must be passed in for integrators using Modern Accounts
    *                      due to Chrome Tab requirements for the best User Experience
    * @param backendName   Backend type to log into
    * @param loginListener Callback to handle the response from the request
    */
  public static void getAccessToken(Context context, @NonNull TMLoginApi.BackendName backendName,
                @NonNull PresenceLoginListener loginListener)
Venue Concession Integration
How to integrate Presence SDK with a Venue Concessions SDK (such as Venue Next SDK):
1.- Integrate Venue Next SDK into your application (as detailed on the VenueNext website)

2.- Set VenueNextDelegate using PresenceSDK.setVenueNext() method, please call this method
before the initializartion of the SDK, e.g. calling startLoginFlow(), start(), etc.
PresenceSDK.getPresenceSDK(getApplicationContext()).setVenueNext(venueNextDelegate);

3.- VenueNextDelegate is an interface with 2 methods:
  a).- retrieveExternalVenueMapping(MappingData) then you can provide your Venue Next id, external_ref_id,  and instance using mappingData.getConsumer().accept() (we provide a consumer if you need to pass that information in an asynchronous fashion).
    @Override
    public void retrieveExternalVenueMapping(@NotNull MappingData mappingData) {
        VenueNextMappingsResponse response = new VenueNextMappingsResponse.Builder(
            venueNextId,
            venueNextExternalRefId,
            venueNextInstance
        ).build();
        mappingData.getConsumer().accept(response);
    }
  b).- handleVenueNextAction(InfoAction), InfoAction has enough information to know
    what your action was inside SDK and manage that in the way you want.
    @Override
    public void handleVenueNextAction(@NotNull InfoAction infoAction) {
        VenueNextActivity.Companion.newInstance(MainActivity.this, infoAction.getInstanceName(), infoAction.getVenueNextAction());
    }
You can go to VenueNextDelegate class to see the complete documentation.

4.- In your VenueNextActivity you can have something like this:
    fun show(instanceName: String, action: VenueNextDelegate.VenueNextAction) {
        //Init VenueNext SDK...
        when(action) {
            VenueNextDelegate.VenueNextAction.ORDER -> VNNavigationController.showOrderHistory(this)
            VenueNextDelegate.VenueNextAction.WALLET -> VNNavigationController.showWallet(this)
        }
    }
Analytics
Presence SDK provides support for tracking user activity via its Analytics module.
For tracking user activity in the Presence SDK a separate class PresenceEventAnalytics is provided that lists all the user actions that are notified via local broadcast manager notifications together with the payload data.
Notification Events – You can observe these notifications to receive updates from Presence SDK.
public static final class Action {

  /////////////////////////////////////////////////////////////////////////////////////////
  // UI events (Start)
  /////////////////////////////////////////////////////////////////////////////////////////
  public static final String ACTION_MYTICKETSCREENSHOWED = "com.ticketmaster.presencesdk.eventanalytic.action.MYTICKETSCREENSHOWED";
  public static final String ACTION_MANAGETICKETSCREENSHOWED = "com.ticketmaster.presencesdk.eventanalytic.action.MANAGETICKETSCREENSHOWED";
  public static final String ACTION_ADDPAYMENTINFOSCREENSHOWED = "com.ticketmaster.presencesdk.eventanalytic.action.ADDPAYMENTINFOSCREENSHOWED";
  public static final String ACTION_REVIEWPOSTINGSCREENSHOWED = "com.ticketmaster.presencesdk.eventanalytic.action.REVIEWPOSTINGSCREENSHOWED";
  public static final String ACTION_POSTINGCONFIRMATIONSCREENSHOWED = "com.ticketmaster.presencesdk.eventanalytic.action.POSTINGCONFIRMATIONSCREENSHOWED";
  public static final String ACTION_CANCELPOSTINGSCREENSHOWED = "com.ticketmaster.presencesdk.eventanalytic.action.CANCELPOSTINGSCREENSHOWED";
  public static final String ACTION_CANCELPOSTINGCONFIRMSCREENSHOWED = "com.ticketmaster.presencesdk.eventanalytic.action.CANCELPOSTINGCONFIRMSCREENSHOWED";
  public static final String ACTION_MYTICKETBARCODESCREENSHOWED = "com.ticketmaster.presencesdk.eventanalytic.action.MYTICKETBARCODESCREENSHOWED";
  public static final String ACTION_TICKETDETAILSSCREENSHOWED = "com.ticketmaster.presencesdk.eventanalytic.action.TICKETDETAILSSCREENSHOWED";
  public static final String ACTION_TICKETSTUBIMAGESHARED = "com.ticketmaster.presencesdk.eventanalytic.action.TICKETSTUBIMAGESHARED";
  public static final String ACTION_FED_LOGIN_LINK_ACCOUNTS_SCREEN_SHOWED = "com.ticketmaster.presencesdk.eventanalytic.action.ACTION_FED_LOGIN_LINK_ACCOUNTS_SCREEN_SHOWED";
  public static final String ACTION_FED_LOGIN_LINK_ACCOUNTS_SCREEN_DISMISSED = "com.ticketmaster.presencesdk.eventanalytic.action.ACTION_FED_LOGIN_LINK_ACCOUNTS_SCREEN_DISMISSED";
  public static final String ACTION_FED_LOGIN_SCREEN_DISMISSED_AFTER_SUCCESS_LOGIN_NO_LINK = "com.ticketmaster.presencesdk.eventanalytic.action.ACTION_FED_LOGIN_SCREEN_DISMISSED_AFTER_SUCCESS_LOGIN_NO_LINK";
  public static final String ACTION_FED_LOGIN_LINK_ACCOUNTS_BUTTON_PRESSED = "com.ticketmaster.presencesdk.eventanalytic.action.ACTION_FED_LOGIN_LINK_ACCOUNTS_BUTTON_PRESSED";
  public static final String ACTION_FED_LOGIN_NO_THANKS_BUTTON_PRESSED = "com.ticketmaster.presencesdk.eventanalytic.action.ACTION_FED_LOGIN_NO_THANKS_BUTTON_PRESSED";
  public static final String ACTION_GAME_DAY_MODAL_SHOWED = "com.ticketmaster.presencesdk.eventanalytic.action.ACTION_GAME_DAY_MODAL_SHOWED";
  public static final String ACTION_GAME_DAY_FLOW_ACCEPTED = "com.ticketmaster.presencesdk.eventanalytic.action.ACTION_GAME_DAY_FLOW_ACCEPTED";
  public static final String ACTION_GAME_DAY_FLOW_REJECTED = "com.ticketmaster.presencesdk.eventanalytic.action.ACTION_GAME_DAY_FLOW_REJECTED";
  public static final String ACTION_ADD_TO_WALLET_INITIATE = "com.ticketmaster.presencesdk.eventanalytic.action.ACTION_ADD_TO_WALLET_INITIATE";

  /////////////////////////////////////////////////////////////////////////////////////////
  // UI events (End)
  /////////////////////////////////////////////////////////////////////////////////////////

  /////////////////////////////////////////////////////////////////////////////////////////
  // Business operation events (Start)
  /////////////////////////////////////////////////////////////////////////////////////////
  public static final String ACTION_TRANSFERINITIATED = "com.ticketmaster.presencesdk.eventanalytic.action.TRANSFERINITIATED";
  public static final String ACTION_TRANSFERCANCELLED = "com.ticketmaster.presencesdk.eventanalytic.action.TRANSFERCANCELLED";
  public static final String ACTION_TRANSFERACCEPTED = "com.ticketmaster.presencesdk.eventanalytic.action.TRANSFERACCEPTED";
  public static final String ACTION_RESALEINITIATED = "com.ticketmaster.presencesdk.eventanalytic.action.RESALEINITIATED";
  public static final String ACTION_RESALECANCELLED = "com.ticketmaster.presencesdk.eventanalytic.action.RESALECANCELLED";
  public static final String ACTION_RESALEUPDATED = "com.ticketmaster.presencesdk.eventanalytic.action.RESALEEDITED";
  /////////////////////////////////////////////////////////////////////////////////////////
  // Business operation events (End)
  /////////////////////////////////////////////////////////////////////////////////////////
}
Payload Data for the Notifications – Only relevant information is sent out with the notification.
public static final class Data {

  // general data for event details, and ticket details
  public static final String EVENT_ID = "event_id";
  public static final String EVENT_NAME = "event_name";
  public static final String EVENT_DATE = "event_date";
  public static final String EVENT_IMAGE_URL = "event_image_url";
  public static final String EVENT_ORDER_ID = "event_order_id";
  public static final String VENUE_NAME = "venue_name";
  public static final String VENUE_ID = "venu_id";
  public static final String CURRENT_TICKET_COUNT = "current_ticket_count";
  public static final String EVENT_ARTIST_NAME = "artist_name";
  public static final String EVENT_ARTIST_ID = "artist_id";

  // data for transfer initiate event
  public static final String INITIATE_TRANSFER_TICKET_COUNT = "initiate_transfer_ticket_count";
  public static final String INITIATE_TRANSFER_TICKET_FACEVALUE = "initiate_transfer_ticket_facevalue";
  public static final String INITIATE_TRANSFER_TICKET_SERIALIZABLE = "initiate_transfer_ticket_serializable";

  // data for transfer cancel event
  public static final String CANCEL_TRANSFER_ID = "cancel_transfer_id";
  public static final String CANCEL_TRANSFER_ORDER_ID = "cancel_transfer_order_id";

  // data for resale initiate event
  public static final String INITIATE_RESALE_TICKET_COUNT = "initiate_resale_ticket_count";
  public static final String INITIATE_RESALE_PRICE = "initiate_resale_price";
  public static final String INITIATE_RESALE_TICKET_SERIALIZABLE = "initiate_resale_ticket_serializable";

  // data for resale update event
  public static final String UPDATE_RESALE_PRICE = "update_resale_price";
  public static final String UPDATE_RESALE_POSTING_ID = "update_resale_posting_id";

  // data for resale initiate and update events
  public static final String RESALE_BUYER_FEES = "resale_buyer_fees";
  public static final String RESALE_ORIGINAL_FACE_VALUE = "resale_original_face_value";
  public static final String RESALE_SELLER_PAYOUT = "resale_seller_payout";
  public static final String RESALE_SELLER_FEES = "resale_seller_fees";

  // data for resale cancel event
  public static final String CANCEL_RESALE_POSTING_ID = "cancel_resale_posting_id";
}
Analytics Usage
If you want to track ACTION_MANAGETICKETSCREENSHOWED event, you should register a local broadcast listener as below:
IntentFilter analyticEventFilter = new IntentFilter();
analyticEventFilter.addAction(PresenceEventAnalytics.Action.ACTION_MYTICKETSCREENSHOWED);
LocalBroadcastManager.getInstance(MainActivity.this).registerReceiver(mAnalyticEventReceiver, analyticEventFilter);
You can implement receiver mAnalyticsEventReceiver as follows:
private BroadcastReceiver mAnalyticEventReceiver = new BroadcastReceiver() {
  @Override
  public void onReceive(Context context, Intent intent) {

    if (PresenceEventAnalytics.Action.ACTION_MYTICKETSCREENSHOWED.equals(intent.getAction())) {
      Toast.makeText(MainActivity.this, "Analytic Event: My tickets screen showed.", Toast.LENGTH_LONG).show();
    }
  }
};
Event/Order/Ticket information
You now can have the data about the event and ticket with the new PresenceOrderDelegate interface to use this interface. You need to implement the interface PresenceOrderDelegate in the view where you want to get this information and pass this interface to the presenceSDK via
PresenceSDK.getPresenceSDK(applicationContext).presenceOrderDelegate = <your_implementation>so when a user gets their events, the function didUpdateEvents from the interface will be called and will return all the events of the user. And when the user enters to some event, the function didUpdateTickets from the interface will be called and will return all the tickets with the information of them.
Release
No additional actions required.

